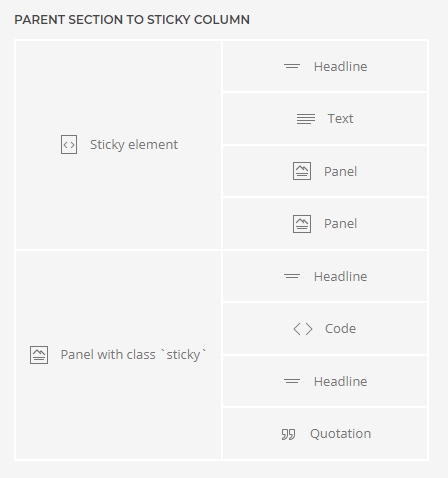
The Yootheme Pro sticky element
The attribute field that appeared in version 2.1 does not allow you to use a sticky column, because the attribute is added for the root element, that is, the column itself. In this case, when you pin the element, the column loses its width and the layout is greatly distorted.

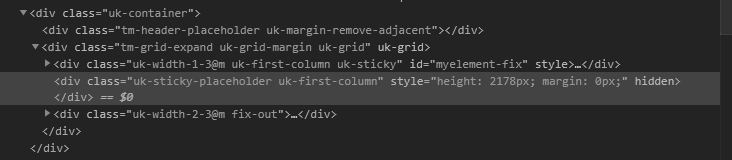
Correct code structure
//section start
<div class="uk-section-default">
    <div class="uk-container">
        //row start
        <div class="uk-grid" uk-grid>
            //column 1
            <div class="uk-width-1-2@s uk-width-1-2@m uk-first-column">
                //sticky element
                <div class="stickyparent uk-sticky">sticky content here</div>
            </div>
            //column 2
            <div class="uk-width-1-2@s uk-width-1-2@m">page content here</div>
        </div>
    </div>
</div>
Workaround
As a solution I wrote a small script that after loading the page adds all the elements with class `sticky` inside the element with class `stickyparent`, where the parent element is the script element itself.
What's inside
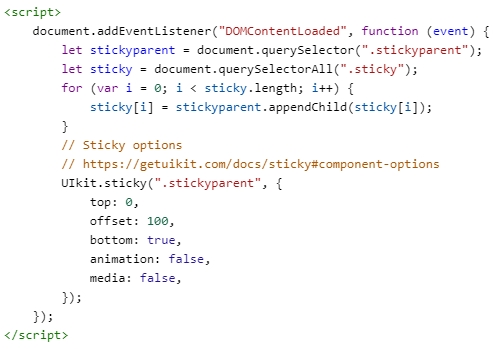
You can use any of the component options inside the script.
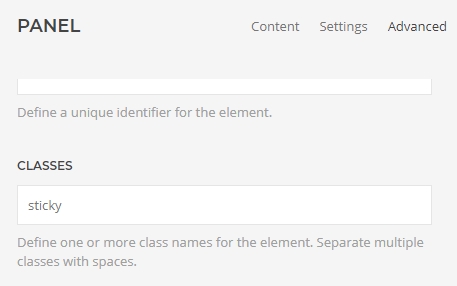
- Download my element and add it to your library.
- Then add it to the column layout and set the class `sticky` for the subsequent elements.